
Sharing a receipt, exporting a report, attaching a map to a support ticket: sooner or later most Flutter apps need to turn part of the UI into an image. The usual answer is the screenshot package. It has over 1,500 likes and more than half a million downloads a month, but its last release, 3.0.0, came out in May 2024, and its repository has 65 open issues and pull requests.
The problems I kept running into were always the same ones: captures that came back null with no reason, tall widgets that were cut off or blurry on Impeller, a fixed delay that was either too short for network images or wasted time, off-screen widgets that lost the app's theme and providers, and Google Maps showing up as a blank rectangle.
So I published screenshot_kit. It keeps the same Screenshot widget and ScreenshotController, so migrating is two lines, and it adds methods for the cases above. This post shows how to use each one.
Install
flutter pub add screenshot_kit
import 'package:screenshot_kit/screenshot_kit.dart';
The package supports Android, iOS, web, macOS, Windows and Linux. Full-screen capture (the last section) is Android and iOS only.
1. Capture a widget on screen
Wrap what you want in a Screenshot widget, give it a controller, and call captureImage.
class ReceiptPage extends StatefulWidget {
  const ReceiptPage({super.key});

  @override
  State<ReceiptPage> createState() => _ReceiptPageState();
}

class _ReceiptPageState extends State<ReceiptPage> {
  final controller = ScreenshotController();

  Future<void> save() async {
    final result = await controller.captureImage();
    debugPrint('${result.width}x${result.height}, ${result.bytes.length} bytes');
  }

  @override
  Widget build(BuildContext context) {
    return Scaffold(
      body: Screenshot(
        controller: controller,
        child: const Text('Total: 42.00'),
      ),
      floatingActionButton: FloatingActionButton(
        onPressed: save,
        child: const Icon(Icons.camera_alt),
      ),
    );
  }
}
captureImage returns a CaptureResult with the encoded bytes, the width and height in physical pixels, and the format. It waits for images inside the widget to finish loading (up to imageTimeout, 10 seconds by default), then for the frame to finish painting. You don't need a Future.delayed before capturing.
2. Capture a widget that is never shown
A share card, a certificate or a PDF page usually shouldn't appear on screen at all. captureWidget renders a widget off-screen and captures it:
Future<CaptureResult> captureCard(BuildContext context) {
  return ScreenshotController().captureWidget(
    const Card(child: Text('Hello')),
    context: context,
    constraints: const BoxConstraints(maxWidth: 400),
  );
}
Passing context matters. The widget is rendered inside your app, at the nearest ScreenshotHost above that context or at the app's Overlay, so Theme.of, localizations, MediaQuery and your providers all work. Without a context it falls back to an isolated pipeline, which has none of them.
If a provider or bloc is scoped to one page, put a ScreenshotHost below it so captures started from that page can read it:
BlocProvider(
  create: (_) => CartBloc(),
  child: ScreenshotHost(child: CartPage()),
)
By default the widget can be at most the size of the screen. Pass constraints to fix its width or to let it grow taller than the screen.
3. Capture a whole ListView as one image
captureScrollable scrolls the view one screen at a time, stitches the pieces together and puts the scroll position back where it was. The scroll view must be inside the Screenshot widget, and its ScrollController is what you pass in.
class LongList extends StatefulWidget {
  const LongList({super.key});

  @override
  State<LongList> createState() => _LongListState();
}

class _LongListState extends State<LongList> {
  final screenshot = ScreenshotController();
  final scroll = ScrollController();

  Future<CaptureResult> captureAll() {
    return screenshot.captureScrollable(scroll, format: ImageFormat.jpeg);
  }

  @override
  void dispose() {
    scroll.dispose();
    super.dispose();
  }

  @override
  Widget build(BuildContext context) {
    return Screenshot(
      controller: screenshot,
      child: ListView.builder(
        controller: scroll,
        itemCount: 200,
        itemBuilder: (context, i) => ListTile(title: Text('Item $i')),
      ),
    );
  }
}
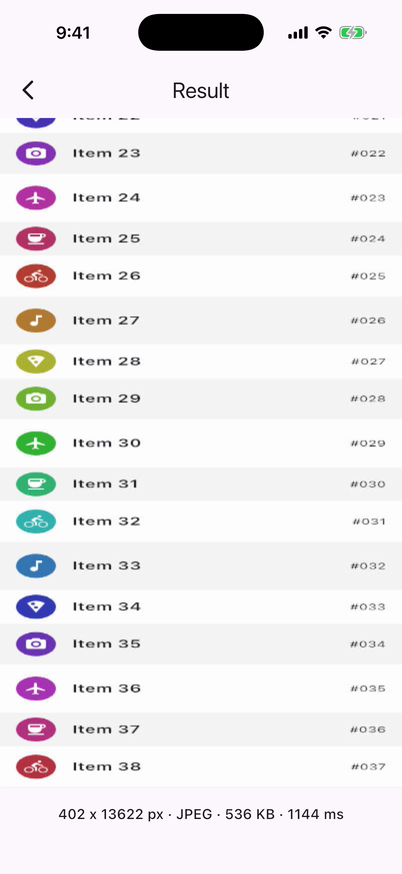
Only the scrolling area ends up in the image. App bars and other widgets around the list are left out, even if they are inside the Screenshot widget.
Tall widgets that aren't scrollable, such as a long receipt in a Column, are handled too: pass constraints to captureWidget and the widget is captured in tiles, so it isn't cut off or blurry on Impeller.
4. Capture the screen including Google Maps and web views
Why does a map show up blank in a normal widget screenshot? Google Maps, WebView, ads and video players are platform views: native Android and iOS views composited next to Flutter's output. Flutter's layer tree, which RepaintBoundary.toImage captures, doesn't contain their pixels.
ScreenshotKit.captureScreen asks the platform for the window exactly as it's shown, so platform views, dialogs and the status bar area are all included:
Future<CaptureResult?> captureWindow() async {
  if (!ScreenshotKit.isScreenCaptureSupported) return null;
  return ScreenshotKit.captureScreen(maxWidth: 1080);
}
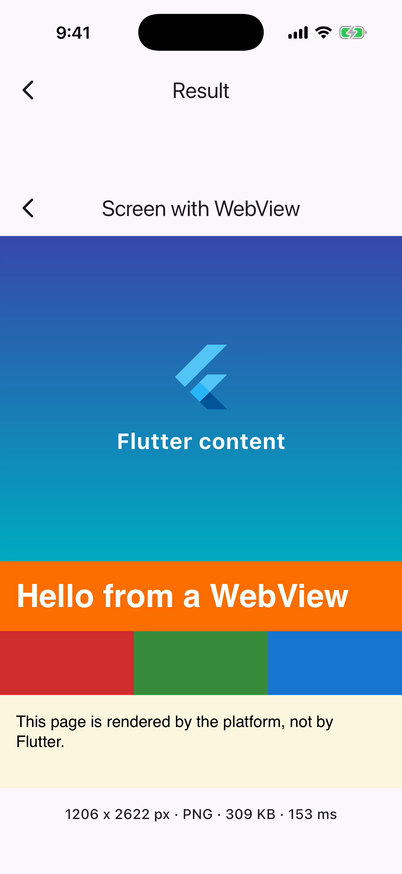
This works on Android and iOS. Elsewhere it throws a ScreenshotException with ScreenshotFailure.unsupportedPlatform, which is why the example checks isScreenCaptureSupported first. After adding the package, do a full rebuild (not a hot restart) so the native plugin is registered.
5. PNG, JPEG, size and quality
Every capture method takes the same output options:
final jpeg = await controller.captureImage(
  format: ImageFormat.jpeg,
  quality: 85,
  background: Colors.white,
  maxWidth: 1080,
);
| Option | What it does |
|---|---|
format |
ImageFormat.png (default), jpeg or rawRgba |
quality |
JPEG quality from 1 to 100, default 90 |
pixelRatio |
Physical pixels per logical pixel, defaults to the device's ratio |
maxWidth, maxHeight |
Lower the pixel ratio so the image fits |
background |
Colour drawn under transparent areas; JPEG uses white if you set none |
Use JPEG with maxWidth for anything you're going to upload or share. A 200-row list is over 11,000 logical pixels tall, so at a 3x pixel ratio the image is more than 33,000 pixels tall. Use rawRgba when you want to process pixels yourself. It gives 4 bytes per pixel, rows from the top.
To share the result, pass result.bytes to share_plus as an XFile.fromData. To save it on mobile and desktop, captureAndSave from the original API still works (it isn't available on the web).
6. Handle failures instead of checking for null
The new methods throw a ScreenshotException with a reason, so you can tell the user something more useful than "something went wrong":
try {
  final result = await controller.captureImage();
  debugPrint('Captured ${result.width}x${result.height}');
} on ScreenshotException catch (e) {
  switch (e.reason) {
    case ScreenshotFailure.notAttached:
      debugPrint('No Screenshot widget uses this controller.');
    case ScreenshotFailure.tooLarge:
      debugPrint('Too large; try a lower pixelRatio or maxWidth.');
    default:
      debugPrint('${e.reason.name}: ${e.message}');
  }
}
The other reasons are notReady (not laid out or painted yet), encodingFailed, invalidScrollController (the controller isn't attached to exactly one scroll view inside the Screenshot widget), unsupportedPlatform and platformError.
Migrating from screenshot
Change the dependency:
dependencies:
  screenshot_kit: ^1.0.0   # was: screenshot: ^3.0.0
and the import:
import 'package:screenshot_kit/screenshot_kit.dart'; // was: package:screenshot/screenshot.dart
capture, captureAsUiImage, captureAndSave, captureFromWidget, captureFromLongWidget and the other 3.0.0 methods keep their signatures, and capture still returns null instead of throwing. A few things behave differently, all on purpose:
- Sharper off-screen captures.
captureFromWidgetandcaptureFromLongWidgetnow default to the device's pixel ratio instead of 1. PasspixelRatio: 1if you relied on the smaller image. delayis a maximum. The off-screen methods continue as soon as images have loaded instead of always waiting the full delay.- Theme and providers carry over when you pass a
context. - Very tall widgets are tiled instead of truncated.
Limitations
- Platform views (maps, web views, ads, video) are only included by
ScreenshotKit.captureScreen, on Android and iOS. - Animations and scrollbars are captured as they look at that moment.
captureScrollableneeds the scroll view inside theScreenshotwidget.- A single capture is limited to 512 MB of RGBA pixels. Lower
pixelRatioor setmaxWidthandmaxHeightfor huge lists.
Try it
The package is on pub.dev and the source is on GitHub. The example app has a demo for each capture type. It builds on the original screenshot package by Sachin Ganesh, released under the MIT license, and it's MIT licensed too.
If it saves you some time, a like on pub.dev helps other Flutter developers find it. If something breaks, please open an issue with your Flutter version and platform.
If your app also talks to IoT devices, I wrote about connecting Flutter to AWS IoT Core with Cognito, which covers my other package, aws_iot_core.